Introduction to Jetpack
Jetpack is a comprehensive toolkit designed for WordPress sites, offering a suite of features that enhance security, performance, and growth. Developed by the team behind WordPress, Jetpack is trusted by millions of sites for its robust capabilities. It provides real-time backups, malware scanning, and spam protection to ensure site security. Performance enhancements include a global CDN, instant site search, and speed optimizations to improve user experience and SEO rankings. Additionally, Jetpack aids in audience growth through social media integration, advanced site stats, and marketing tools like the Blaze ad network. With both free and premium options, Jetpack is a versatile plugin that caters to the diverse needs of WordPress users, making it an essential tool for anyone looking to elevate their website's functionality and reach.
Use Cases of Jetpack
Jetpack, a comprehensive suite of tools for WordPress sites, offers several use cases that enhance security, performance, and growth. Here are some key applications:
1. Security Enhancements: Jetpack Security provides real-time backups, malware scanning, and spam protection. This ensures your site remains secure and operational, with features like VaultPress Backup and Jetpack Scan guarding against threats.
2. Performance Optimization: With features like a global CDN and Jetpack Boost, your site loads faster, improving user experience and SEO rankings. VideoPress allows for seamless video hosting and playback within the WordPress editor.
3. Marketing and Growth: Jetpack Social automates social media sharing, while Jetpack Stats offers detailed analytics to help you understand and grow your audience. The Blaze ad network helps promote your content across millions of sites.
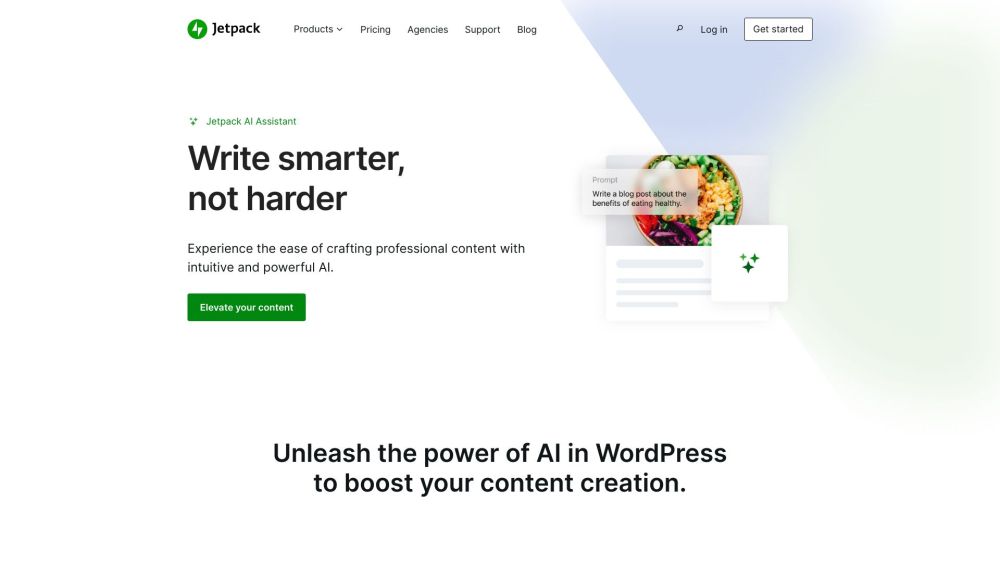
4. AI-Powered Content Creation: Jetpack's AI Assistant simplifies content creation by integrating AI tools directly into the WordPress editor, aiding in drafting, editing, and polishing posts efficiently.
These use cases make Jetpack an essential tool for any WordPress site owner looking to enhance their online presence effectively and efficiently.
How to Access Jetpack
Step 1: Visit the Jetpack AI Assistant Page
Begin by navigating to the Jetpack AI Assistant page on the AIPURE website. You can access it directly by clicking here: Jetpack AI Assistant.

Step 1: Install Jetpack Plugin
If you are using a self-hosted WordPress site, you need to install the Jetpack plugin to access the AI Assistant. Follow these steps:
- Go to your WordPress dashboard. Navigate to the 'Plugins' section on the left-hand menu.
- Click on 'Add New'. This will take you to the WordPress plugin repository.
- Search for 'Jetpack'. In the search bar, type 'Jetpack' and press enter.
- Install Jetpack. Once you find the Jetpack plugin by Automattic, click the 'Install Now' button.
Step 2: Activate Jetpack
- After installation, click 'Activate' to enable the plugin on your site. This step is crucial as it initializes Jetpack's features.
Step 3: Connect Jetpack to WordPress.com
- Click on 'Set Up Jetpack'. A new window will prompt you to connect your WordPress site to a WordPress.com account.
- Sign in or create a WordPress.com account. If you already have an account, sign in. Otherwise, create a new account.
- Authorize Jetpack. Follow the on-screen instructions to authorize the connection between your site and WordPress.com.
Step 4: Configure Jetpack Settings
- Customize Jetpack features. Once connected, you can choose which Jetpack features to enable or disable according to your needs.
- Save your settings. Make sure to save any changes you make in the Jetpack settings dashboard.
By following these steps, you will successfully access and configure Jetpack on your WordPress site, enhancing its security, performance, and functionality.
How to Use Jetpack
Step 1: Installation and Activation
- Action: Go to your WordPress dashboard, navigate to 'Plugins' > 'Add New', search for 'Jetpack', and install it. Activate the plugin.
- Explanation: Installing Jetpack is the first step to unlocking its features. Activation integrates Jetpack with your WordPress site, allowing you to manage its functionalities directly from your dashboard.
Step 2: Connect to WordPress.com
- Action: After activation, you'll be prompted to connect Jetpack to a WordPress.com account. Click on 'Connect to WordPress.com'.
- Explanation: Connecting to WordPress.com enables Jetpack to sync your site with its servers, necessary for features like backups, security scans, and stats.
Step 3: Configure Security Features
- Action: In the Jetpack dashboard, select 'Security' and enable features like 'VaultPress Backup', 'Scan', and 'Akismet Anti-spam'.
- Explanation: Activating security features helps protect your site from malware, spam, and data loss by providing real-time backups and malware scanning.
Step 4: Optimize Performance
- Action: Under the 'Performance' tab, enable 'Boost' for speed enhancements and 'Photon' for CDN services.
- Explanation: These tools help improve your site's loading times and overall performance, which is crucial for user experience and SEO.
Step 5: Enhance Growth with Marketing Tools
- Action: Navigate to the 'Growth' section and activate 'Jetpack Social' and 'Jetpack CRM'.
- Explanation: These features allow you to automate social media sharing and manage customer relationships, helping you grow your audience and engage with customers more effectively.
By following these steps, you can effectively utilize Jetpack to enhance your WordPress site's security, performance, and growth potential.
How to Create an Account on Jetpack
Step 1: Visit the Jetpack Website
- Go to the AIPURE website at aipure.ai/, search for "Jetpack", and click on "Visit Website", where you can access all Jetpack services and information directly.

Step 2: Navigate to the Sign-Up Section
- Look for the "Sign Up" or "Get Started" button on the homepage. This button is usually prominently displayed and will lead you to the account creation page.

Step 3: Enter Your Details
- Fill in the required information, such as your email address, username, and password. Ensure that your password is strong and unique to enhance account security.
Step 4: Verify Your Email
- After submitting your details, check your email inbox for a verification message from Jetpack. Click on the verification link provided to confirm your account.
Step 5: Complete the Setup
- Once your email is verified, follow the on-screen instructions to complete the setup process. This may include selecting a plan (free or paid) and connecting your WordPress site to Jetpack.
By following these steps, you will successfully create a Jetpack account, enabling you to access its powerful security, performance, and growth features for your WordPress site.
Tips for Using Jetpack
Jetpack is a powerful suite of tools for WordPress sites, offering security, performance, and marketing features. Here are some tips to help you make the most of Jetpack:
- Optimize Security: Ensure your site is protected by enabling features like VaultPress Backup for real-time backups and Jetpack Scan for malware detection. Regularly update your Jetpack plugin to benefit from the latest security enhancements.
- Enhance Performance: Use Jetpack Boost to optimize your site's speed with one-click performance improvements. Enable the free global CDN to deliver your content faster to visitors worldwide.
- Grow Your Audience: Leverage Jetpack Social to automatically share your posts on social media. Use Jetpack Stats to track your site's performance and understand your audience better.
- AI-Powered Content: Take advantage of Jetpack's AI features to streamline content creation. The AI Assistant can help you draft, edit, and polish your posts more efficiently.
- Mobile Access: Use the Jetpack mobile app to manage your site on the go. This allows you to monitor security, perform backups, and restore your site from anywhere.
By following these tips, you can ensure that your WordPress site is secure, fast, and well-promoted, helping you to engage and grow your audience effectively.


