Introduction to GPT Engineer
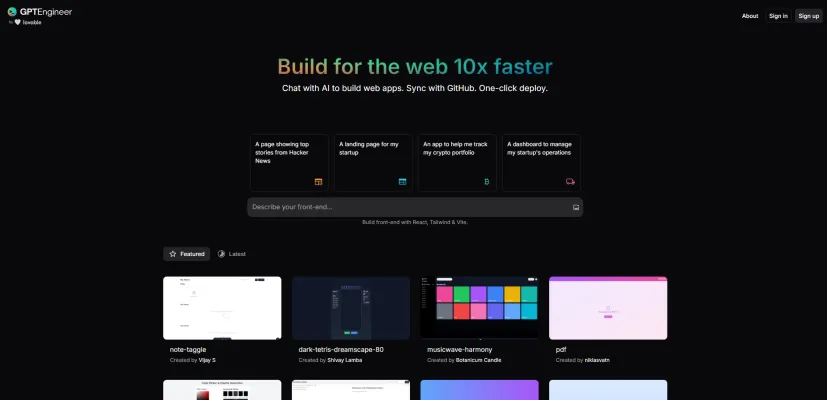
GPT Engineer is an innovative AI-driven tool designed to streamline the software development process by generating code based on natural language specifications. Users can describe what they want to build in simple terms, and the AI will ask for clarifications if needed, then proceed to construct the codebase. This tool is particularly useful for developers who want to accelerate their workflow without sacrificing the quality of their code.
The platform supports various programming languages and frameworks, making it versatile for different project requirements. GPT Engineer is also designed to be adaptable, allowing users to customize the AI's output to match their coding style and project specifics. By leveraging advanced AI models, GPT Engineer aims to democratize software development, making it more accessible to non-technical individuals and teams looking to bring their ideas to life quickly and efficiently.
Use Cases of GPT Engineer
1. Rapid Web App Prototyping:
GPT Engineer excels in quickly transforming natural language descriptions into functional web applications. This capability is invaluable for startups and developers looking to validate ideas without extensive coding. By simply specifying the desired features and design in a chat interface, users can have a prototype ready for review and iteration in a fraction of the usual development time.
2. Custom Dashboard Creation:
For businesses needing tailored operational dashboards, GPT Engineer can generate intuitive interfaces that display key metrics and data visualizations. This use case is particularly beneficial for startups managing multiple data streams and requiring real-time insights to make informed decisions.
3. Educational Tool Development:
Educators and developers can leverage GPT Engineer to create interactive educational tools and platforms. By describing the learning objectives and desired interactivity, GPT Engineer can produce applications that facilitate learning through engaging and personalized experiences.
4. Personal Assistant Apps:
GPT Engineer is adept at building personal assistant applications that help users manage tasks, reminders, and schedules. By defining the scope of assistance and user interactions, developers can quickly deploy apps that enhance productivity and organization.
5. Portfolio and Landing Page Generation:
For freelancers and small businesses, GPT Engineer can rapidly produce professional portfolio websites and landing pages. By inputting project details and branding elements, users can have a polished online presence without the need for extensive web development skills.
6. Internal Tool Development:
Companies can use GPT Engineer to quickly develop internal tools that streamline workflows and enhance operational efficiency. By specifying the functionalities required, such as data entry forms or report generators, businesses can deploy custom tools tailored to their specific needs.
GPT Engineer's ability to swiftly translate user requirements into tangible web applications makes it a powerful tool for various sectors, enabling faster development cycles and more agile responses to market demands.
How to Access GPT Engineer
- Visit the Official Website: Go to https://gptengineer.app/ to access the GPT Engineer platform. This is the primary portal where you can start using the AI-powered web app builder.
- Create an Account: Click on the sign-up or login button to create your account. Providing a valid email address and setting up a password is typically required. This step ensures you have personalized access to the platform's features.
- Enter Your API Key: Once logged in, you'll need to enter your OpenAI API key. This key is crucial as it allows the platform to utilize OpenAI's powerful language models for generating web applications.
- Start Building: With your account set up and API key entered, you can now begin specifying what you want to build in the provided textbox. Use natural language to describe your web app requirements.
- Review and Deploy: After describing your project, the AI will generate the code. Review the generated code and make any necessary adjustments. Once satisfied, you can deploy your web app with a single click, making it live and accessible.
By following these steps, you can efficiently leverage GPT Engineer to build web applications quickly and intuitively.
How to Use GPT Engineer
1. Install GPT Engineer:
- Stable Release: Run
python -m pip install gpt-engineerto install the latest stable version. - Development Version: Clone the repository using
git clone https://github.com/gpt-engineer-org/gpt-engineer.git, then navigate to the directory and activate the virtual environment withpoetry installandpoetry shell.
2. Set Up API Key:
- Environment Variable: Export your OpenAI API key using
export OPENAI_API_KEY=[your api key]. - .env File: Create a
.envfile in your project directory and addOPENAI_API_KEY=[your api key].
3. Create a New Project:
- Empty Folder: Create an empty folder for your project.
- Prompt File: Inside the folder, create a
promptfile and describe what you want to build in natural language.
4. Run GPT Engineer:
- Default Usage: Execute
gpteto start the AI-driven code generation based on your prompt. - Improve Existing Code: Use
gpte -iif you have existing code and want the AI to improve it based on your new prompt.
5. Customize Pre Prompts (Optional):
- Identity Customization: Override the
prepromptsfolder with your own version to customize the AI's behavior and coding style. Use the--use-custom-prepromptsargument to apply your customizations.
By following these steps, you can leverage GPT Engineer to rapidly prototype and develop software projects using AI-driven code generation.
How to Create an Account on GPT Engineer
To create an account on GPT Engineer, follow these step-by-step instructions:
- Visit the GPT Engineer Website: Go to GPT Engineer. This is the official platform where you can build web apps using AI.
- Navigate to the Sign-Up Page: Look for the "Create account" or "Sign up" link, usually located at the top right corner of the homepage. Clicking this will take you to the registration page.
- Enter Your Details: Fill in the required information such as your email address, username, and password. Ensure your password is strong and unique to protect your account.
- Verify Your Email: After submitting your details, check your email for a verification link sent by GPT Engineer. Click on the link to confirm your account. This step is crucial to activate your account and ensure it is secure.
- Log In: Once your email is verified, return to the GPT Engineer website and use your newly created credentials to log in. This will grant you access to the platform's features and services.
By following these steps, you will successfully create an account on GPT Engineer, enabling you to start building web applications with the assistance of AI.
Tips for Using GPT Engineer
GPT Engineer is a powerful tool for rapid web app development using natural language. To make the most of this innovative platform, consider these tips:
- Contextual Prompting: Start by providing a clear context of your project. This helps GPT Engineer understand the scope and specific needs of your application, leading to more accurate and relevant code generation.
- Incremental Prompting: Break down your requests into smaller, manageable prompts rather than overwhelming the system with a complex, single prompt. This approach allows for more precise adjustments and improvements.
- Use Image Prompts: If your project involves visual elements, use image prompts to guide the AI. This can be particularly useful for UI/UX design, ensuring that the generated code aligns with your visual expectations.
- Be Specific: Clearly articulate your requirements to avoid ambiguity. Specific prompts yield more targeted and useful results.
- Add Constraints: If there are specific limitations or requirements (like performance benchmarks or design constraints), include them in your prompts to guide the AI effectively.
By following these tips, users can enhance their interaction with GPT Engineer, leading to more efficient and successful project outcomes.


